
How To Connect A Cricut Explore Air 2? [A Beginner's Guide]
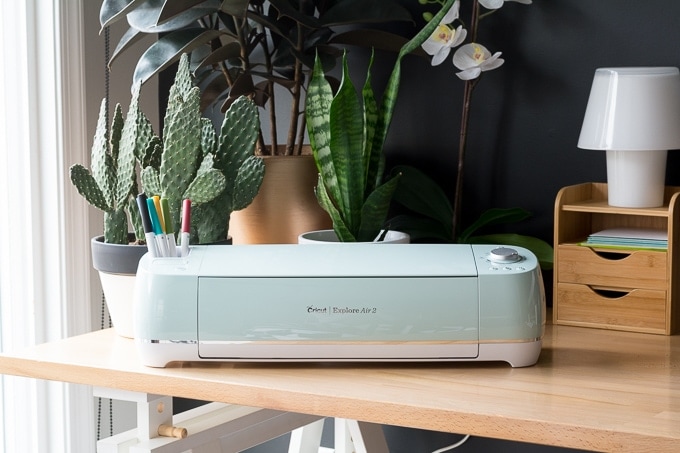
So, you've just bought a new Cricut Explore Air 2 machine and are wondering how to use it. The Cricut Explore Air 2 is an ultimate cutting machine that cuts, scribes, and scores different types of materials to create craft projects.
Maybe you are considering buying and want to know about the features of the Cricut machine and how this Explore Air 2 differs from previous models. We will start at the beginning: unboxing this machine, and we will end with how to connect a Cricut Explore Air 2 to a Windows and Mac.
If you have an older Explore Air machine, don't worry. There are some differences between machines and how to use the Cricut Explore Air 2.
What Is Cricut Explore Air 2 Used For?
The Cricut Explore Air 2 is a craft cutting machine used to create projects for your home, school, business, or hobby. It can cut over 100+ different types of materials, such as paper, cardstock, vinyl, and iron-on, to specialty materials, such as cork, glitter paper, and fabric. This is machine compatible with 6 tools to cut, write, score and foil like a professional. With the Explore Air 2, custom cards, home decor, T-shirts, and more are just a few clicks away. Use the Cricut Design Space software for your Windows, Mac, iOS, and Android devices.

How To Use a Cricut Explore Air 2?
In order to use the Explore Air 2 machine, follow the basic instructions given below:
First, let's open the box of the Explore Air 2 machine
Let's make sure you're not missing any items. If nothing is added, return the Explore Air 2 to the store where you bought it or contact Cricut support for an expedited replacement. If you have some to spare, that's a nice bonus.
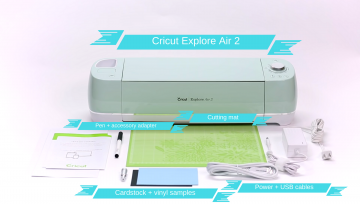
Your box should include the following:
- Cricut Explore Air 2 machine
- Cricut Mat
- Power + USB Cable
- Cutting Blade
- Silver Pen and Accessory Adapter
- Manual Book
- Cardstock and Vinyl Samples
What's The Main Difference Between Explore Air 2 And The Explore Air?
The Explore Air and Explore Air 2 models look the same and have all the same features. What's the main difference? The answer is speed and color. The Explore Air 2 features 2 times faster machine that works with paper, cardstock, vinyl, and iron-on. Also, it includes 3 beautiful colors: Pastel Pink, Mint Green, and Sky Blue. And that is all!
How To Connect a Cricut Explore Air 2 Via a USB Cable?
Are you trying to connect the Cricut Explore Air 2 with a USB cable? Follow the basic instructions below to connect your Explore Air 2 machine to your Windows and Mac system using a USB cable.
For Windows/Mac
- Get the Cricut machine on. It doesn't have the same maximum distance requirements as a Bluetooth connection, but you don't want to strain a USB cable.
- After that, connect a USB cable between the Cricut machine and your computer.
- If you bought a brand new Cricut machine, it comes with a USB cable.
- If you need a USB cable, buy one from the Cricut official website.
- Now, download and install the Cricut Design Space software on your computer.
- Go to "cricut.com/setup" in an internet browser and follow the on-screen steps to download the software.
- Once you've created an account with the Design Space software, it will automatically detect your connected machine and download the drivers.
How To Pair a Cricut Explore Air 2 Via Bluetooth?
The Cricut Explore Air 2 machine is Bluetooth-compatible. Most PCs are Bluetooth-enabled. In order to use wireless Bluetooth with the Cricut machine, all you need to do is pair the machine with your operating system.
- First, open "Bluetooth & other devices"from the "Settings" tab.
- Confirm that Bluetooth is on (on your device) and tap "Bluetooth or other device."

- After that, you need to click on the "Bluetooth"section.

- Ensure the machine is on and close to your device (10-15 feet away).
- Your device will show the available devices to connect.
- Now, you have to select the machine from the given list.
- Your device will prompt for a PIN code. Enter "0000," and hit the "Connect"button.

Note: the PIN code is the same for all.
- The Cricut machine will now be connected to your device.
- Once the Cricut machine is connected via Bluetooth, the "Power"button light will change from white to blue.
Connecting the Cricut machine via Bluetooth will differ depending on your operating system.
If your device is not Bluetooth enabled, you must buy a USB cable called a Bluetooth dongle to allow your device to connect to the Cricut machine wirelessly. If you need a wireless Bluetooth dongle for your device, Cricut suggests buying one that supports audio devices. Cricut notes that CSR (Cambridge Silicon Radio) Bluetooth dongles don't work with Cricut cutting machines.
Visit: Cricut.com/setup
www.cricut.com/setup
cricut setup
setup cricut machine


Comments
Post a Comment